Product brief description
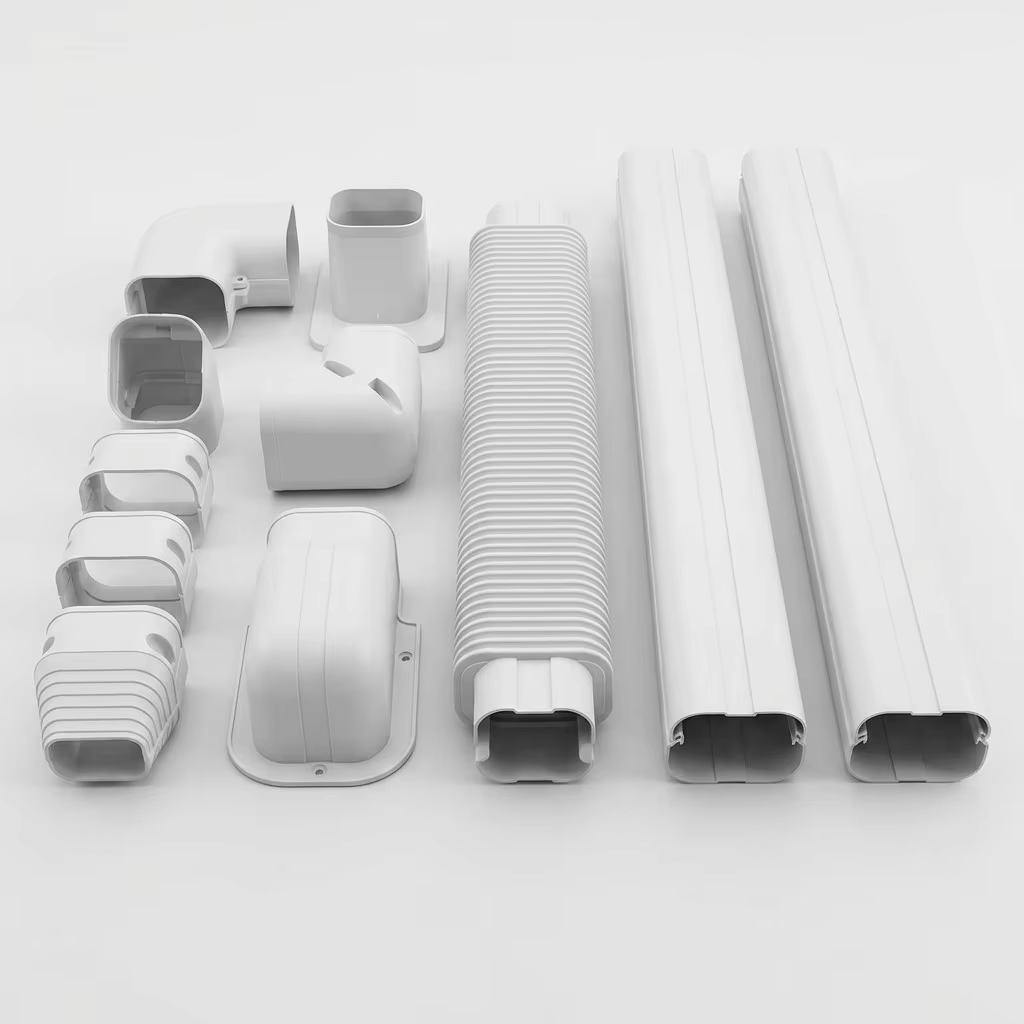
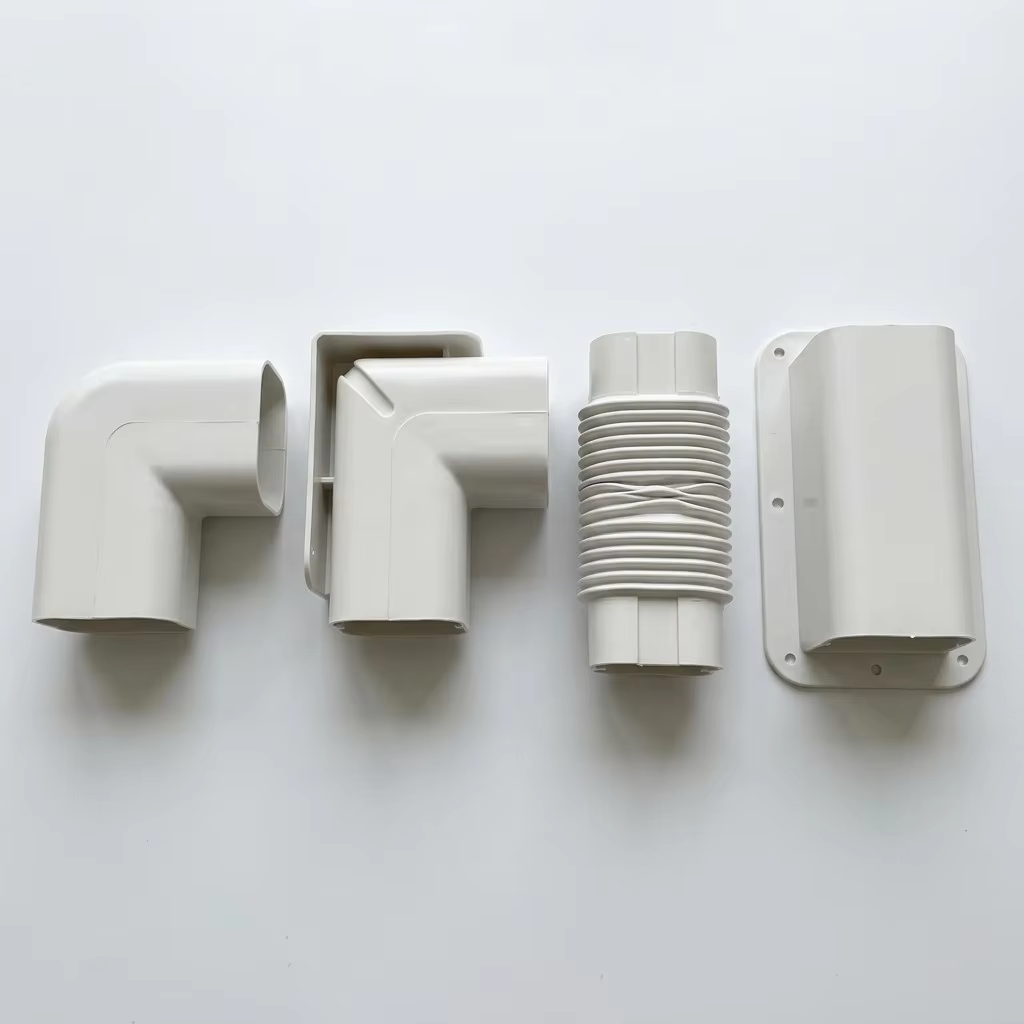
Standard square trunking says "afterthought." This rounded-rectangle decorative duct system says "designed." The smooth, curved profile blends into modern interiors instead of standing out against them. Each kit includes everything for a complete single-unit installation: two straight duct sections, a flat 90° elbow for horizontal turns, a wall elbow for internal corners, a flexible corrugated connector to bridge the gap to the indoor unit, a wall entry/exit cover with mounting flange, and couplers to join sections seamlessly. The snap-fit cover design means no visible screws, no adhesive, and a perfectly flush seam along the entire run. Made from high-impact UV-stabilized PVC, the duct is paintable to match any wall color and rated for both indoor and outdoor use. One kit, one clean line, one professional installation.
Product detailed description
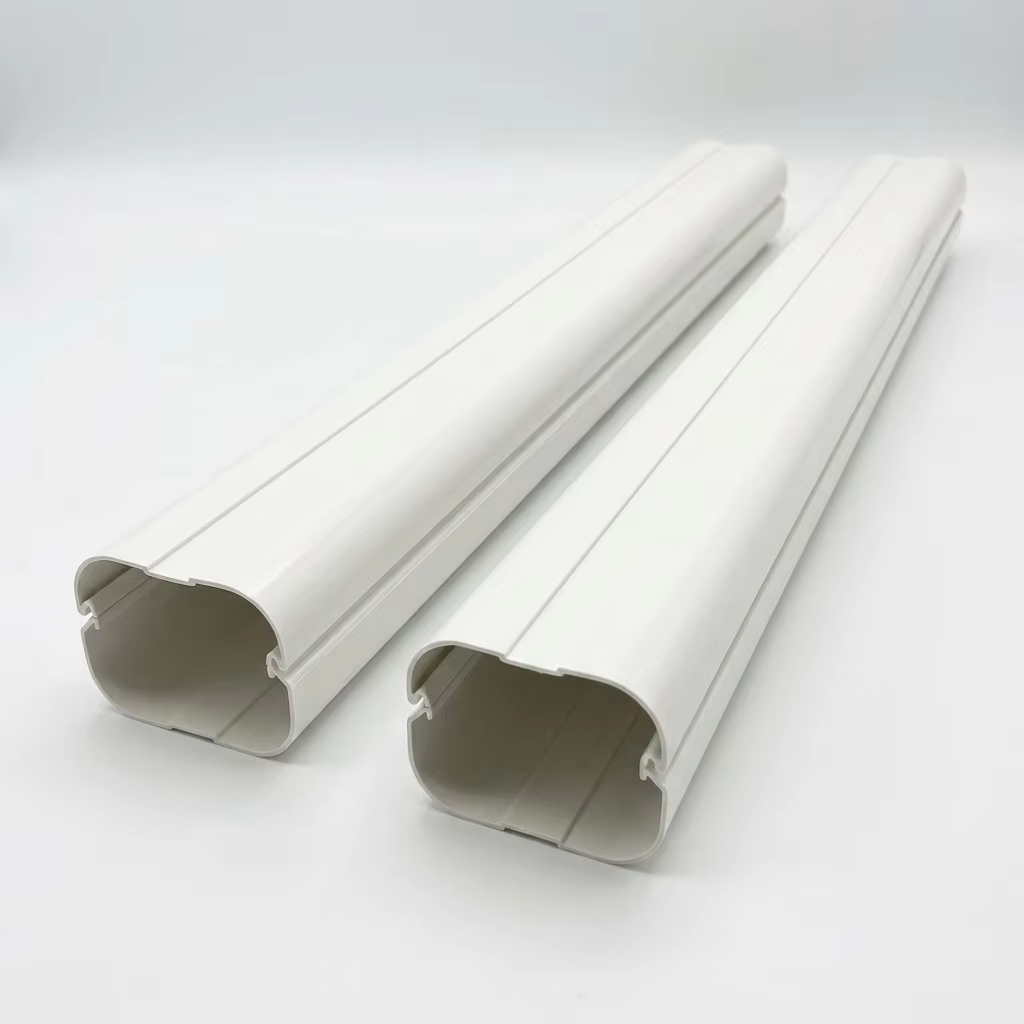
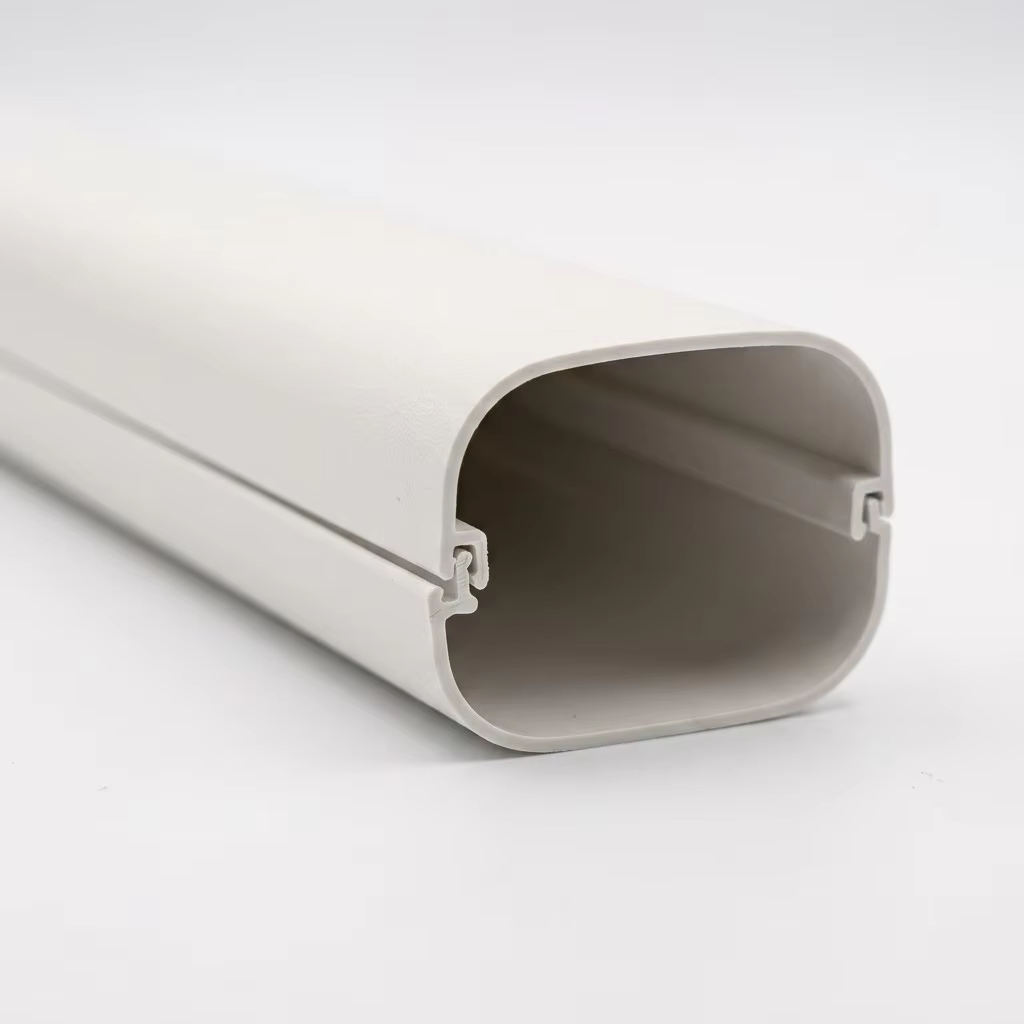
The Visual Difference a Curve Makes
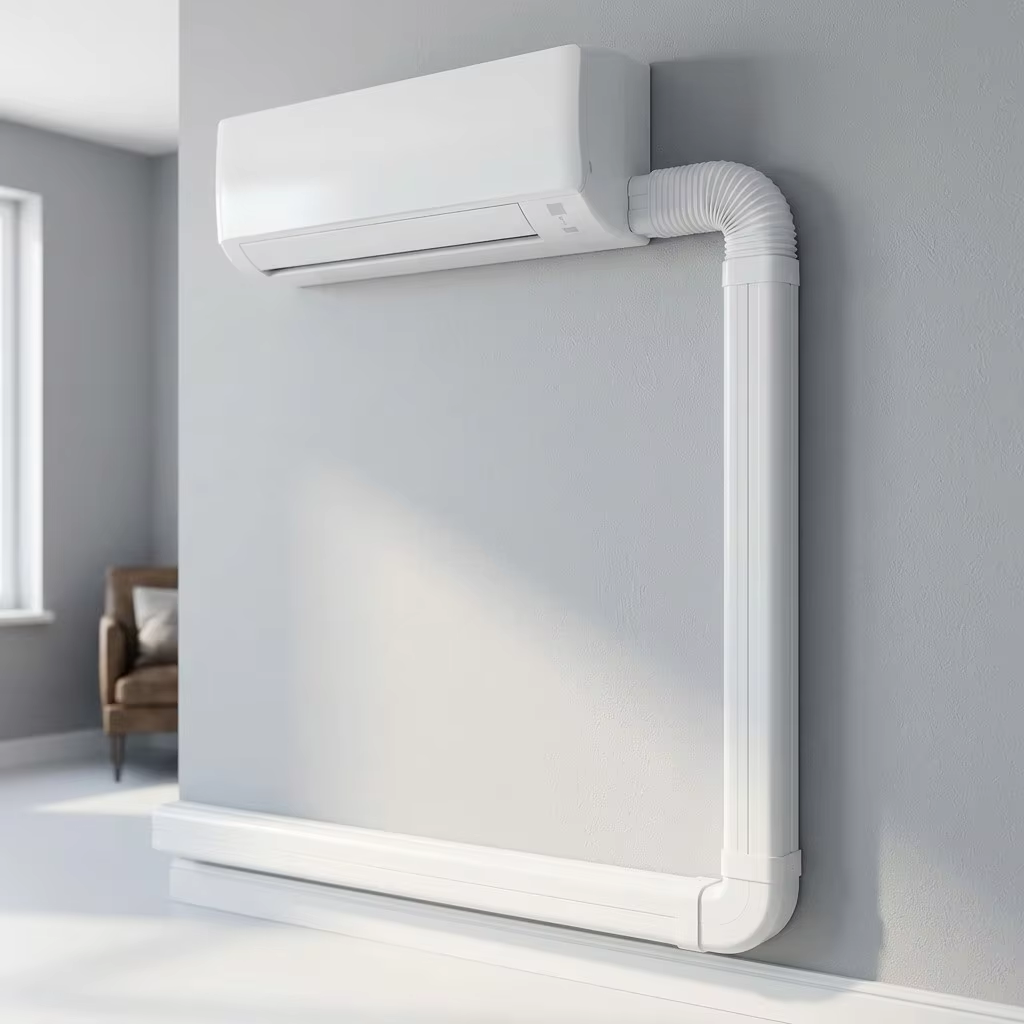
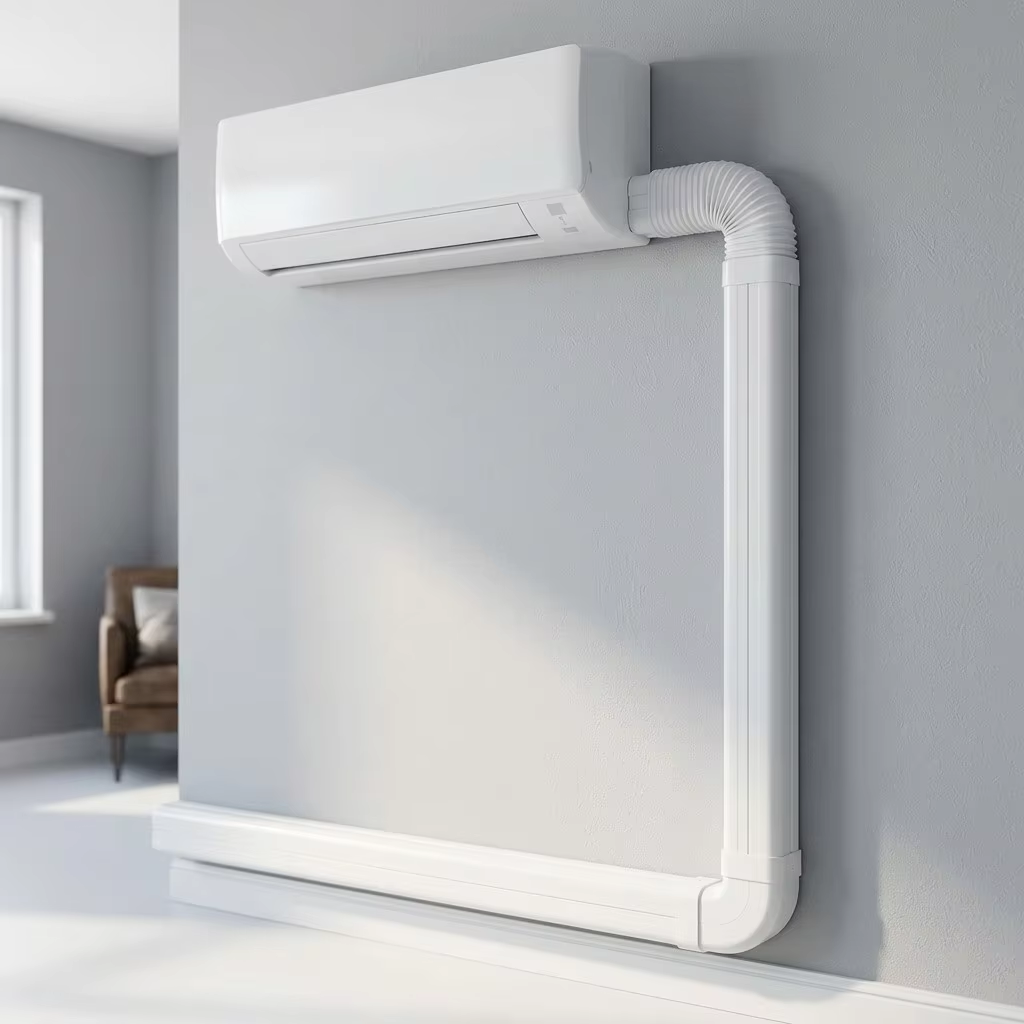
Standard square trunking has a problem: it looks like square trunking. The sharp 90° corners catch the eye against soft interior walls, and the boxy profile broadcasts "this was added after the house was built." Our rounded-rectangle design changes the visual language. The gentle radius on the top and bottom edges softens the shadow line against the wall. The continuous smooth profile from cover to fittings creates a single unbroken visual flow from indoor unit to outdoor wall penetration. It's the difference between a cable channel and an architectural detail — and in premium residential installations, that difference is everything.
One Kit, Every Fitting, No Separate Orders
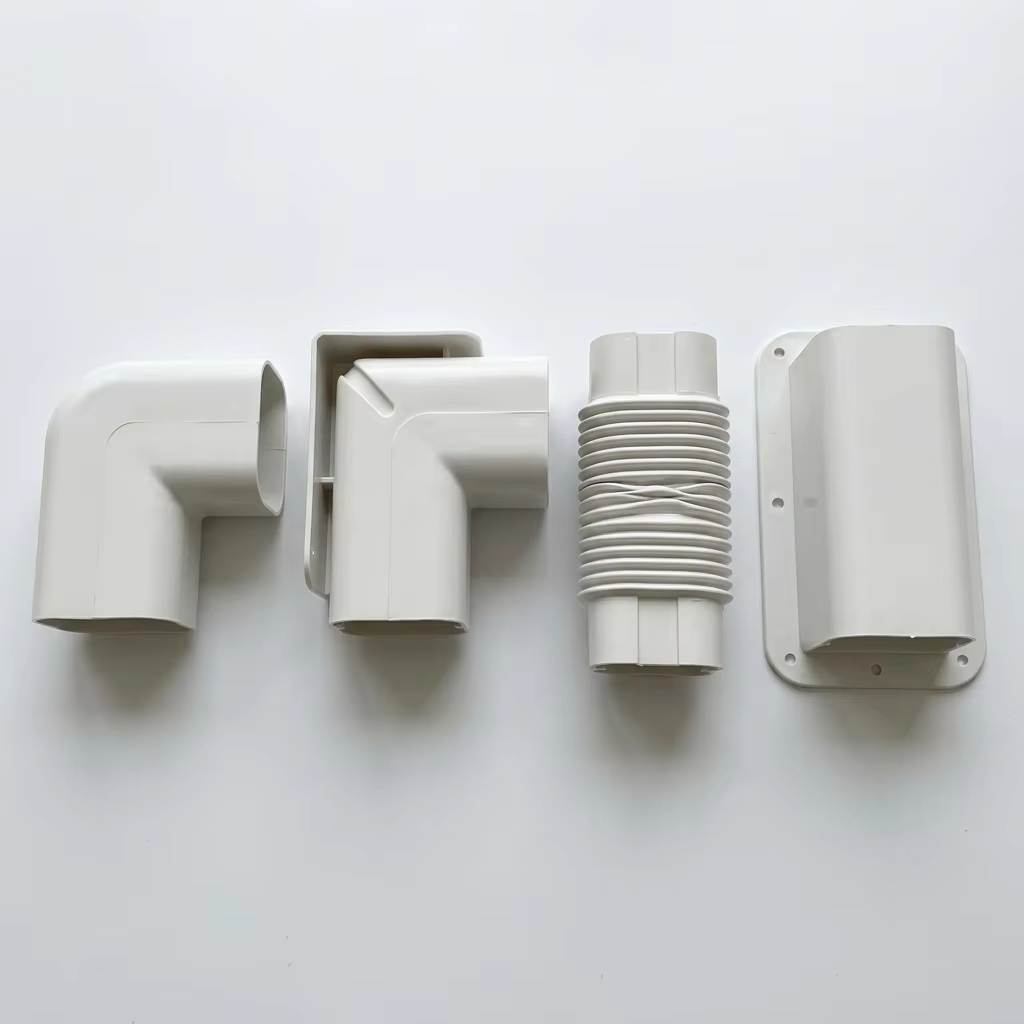
We ship every decorative tube kit as a complete system because nothing frustrates an installer more than arriving on-site with the straight duct and discovering the corner piece is a separate SKU. Each kit contains: two 1-meter straight duct sections with snap-fit covers, one flat 90° elbow for routing horizontally along a wall, one wall elbow for navigating internal room corners, one flexible corrugated connector section that bridges the final gap between the rigid duct and the indoor unit's pipe outlet, one wall entry/exit cover with a flanged mounting plate that creates a clean transition where the pipes penetrate the wall, and a set of couplers to join sections end-to-end. Everything in one box. Everything matches.
The Flexible Connector — The Detail Other Kits Miss
The gap between the rigid trunking and the indoor unit body is the messiest 20 centimeters of most AC installations. Pipes and cables bundle loosely, tape wraps unevenly, and the result looks unfinished. Our flexible corrugated connector solves this. It snaps into the last coupler on the trunking run at one end and wraps neatly around the pipe bundle at the other, following the natural curve into the unit. The corrugations flex to accommodate small misalignments without kinking or pulling out of the connector. It's a small component that makes a disproportionate difference to the finished appearance.
Snaps Together, Snaps Open, No Tools
Every joint in this system uses a mechanical snap-fit — the cover presses onto the base channel with firm hand pressure and locks with an audible click. No screws pierce the cover surface. No adhesive dries out and separates over time. When the AC needs servicing, the cover snaps off just as easily for full pipe access, then snaps back on without replacing any hardware. The couplers align the straight sections end-to-end with zero visible gap. The result is a continuous, flush surface from one end of the run to the other.
Painter-Ready Surface
The PVC surface is formulated with a slightly textured matte finish that accepts standard interior and exterior paints without a separate primer. If your client's wall is RAL 9010 pure white, leave the duct as-is — it's a close match out of the box. If the wall is anything else, scuff the duct surface lightly with 400-grit sandpaper, wipe with alcohol, and roll or spray the same wall paint. The duct disappears. For exterior runs, use a UV-resistant exterior-grade paint to extend the duct's already-strong UV protection.
Indoor-Grade Looks, Outdoor-Grade Durability
Despite its refined appearance, this duct is built for real-world conditions. The PVC compound includes UV stabilizers that prevent yellowing under sunlight, impact modifiers that resist cracking from accidental bumps, and a flame-retardant package rated to UL94 V-0. The same duct that looks elegant on a bedroom wall will survive the sun, rain, and temperature swings on the exterior wall down to the condenser. One product for the entire pipe run — no switching from "indoor decorative" to "outdoor heavy-duty" halfway down the wall.
Product Specifications
MODEL |
WIDTH × HEIGHT |
SUITABLE PIPE COMBO |
KIT CONTENTS |
PIECES / CARTON |
RB-ADT-5070 |
50 × 70 mm |
1/4"+3/8" + drain hose |
2 straight ducts + cover, flat elbow, wall elbow, flex connector, wall cover, 2 couplers |
10 kits |
RB-ADT-6070 |
60 × 70 mm |
1/4"+1/2" + drain hose |
2 straight ducts + cover, flat elbow, wall elbow, flex connector, wall cover, 2 couplers |
10 kits |
RB-ADT-7070 |
70 × 70 mm |
1/4"+1/2" + drain hose + cable |
2 straight ducts + cover, flat elbow, wall elbow, flex connector, wall cover, 2 couplers |
8 kits |
RB-ADT-8080 |
80 × 80 mm |
3/8"+5/8" + drain hose + cable |
2 straight ducts + cover, flat elbow, wall elbow, flex connector, wall cover, 2 couplers |
6 kits |
FAQ
Q1: What's the difference between this decorative tube and standard square AC trunking?
A: The difference is primarily aesthetic. Standard trunking has a square/rectangular cross-section with sharp corners — functional but visibly industrial. Our decorative tube has a rounded-rectangle profile with curved top and bottom edges that cast softer shadows and blend more naturally into residential interiors. It also includes a flexible connector piece for the indoor unit transition that standard trunking kits typically lack. Functionally they do the same job — the decorative tube looks better doing it.
Q2: How many kits do I need for one split AC installation?
A: One complete kit covers a standard installation with a ~2m straight run and one corner. For most residential wall-mounted indoor units where the outdoor unit is directly behind or below on the same wall, one kit is sufficient. For longer runs — for example, routing pipes across a ceiling, down a hallway, or through multiple corners — you'll need additional straight sections and fittings, which are sold separately. Measure the total pipe run length and count the number of direction changes (corners) before ordering.
Q3: Can the duct be cut to a custom length?
A: Yes. Both the straight duct base channel and the snap-fit cover can be cut with a fine-tooth hand saw or PVC cutter. Cut square for clean butt joints when using couplers. For angled cuts to match a sloped ceiling or custom corner angle, a miter saw with a fine-tooth blade works well. Deburr all cut edges with sandpaper for a clean finish and to ensure the cover snaps on smoothly.
Q4: How does the flexible connector attach to the indoor unit?
A: The flexible corrugated connector has smooth rectangular end-fittings at both ends. One end snaps into the last coupler or straight duct section in the trunking run. The other end is positioned at the indoor unit's pipe outlet — it does not mechanically attach to the unit itself but wraps around the pipe bundle, covering the gap between the trunking and the unit body. The corrugated section flexes to accommodate the natural curve of the pipes as they exit the unit. For a neater finish, use white electrical tape or a cable tie (concealed behind the connector) to bundle the pipes tightly before positioning the connector.
Q5: How do I paint the duct to match my wall?
A: (1) Lightly sand the entire outer surface with 400-grit sandpaper to create a mechanical key for the paint — the factory finish is slightly textured but paint adheres better with sanding.
(2) Wipe clean with isopropyl alcohol or a damp cloth to remove sanding dust.
(3) Apply a thin, even coat of interior latex or exterior acrylic paint using a foam roller for the smoothest finish or a brush for the fitting details.
(4) Allow to dry completely before snapping the cover closed. Do NOT paint the inside of the cover, the snap-fit locking edge, or the inside of the couplers — paint buildup in these areas will interfere with the snap mechanism. For exterior runs, use a paint rated for outdoor PVC surfaces.


 ONLINE

 EN
EN